Spring-Security Reference 따라하기 1
by Jeongjin Kim
목적
내가 원하는 인증과 권한 모델을 스프링 시큐리티와 결합하여 프레임워크에서 제공하는 보안 기능을 최대한 활용하고자 한다. 구체적인 인증과 권한 모델의 Database table 설계는 차후 진행하고 먼저 레퍼런스를 참고하면서 스프링 시큐리티는 어떤 구조로 되어 있고 내가 커스터마이즈 할 수 있는 부분이 어디인지 또 어떻게 해야 하는지 공부하면서 기록해보고자 한다.
스프링 시큐리티 개요
스프링 시큐리티가 목표로 하는 주요 영역은 인증과 권한 부여이고 이를 위해 다양한 인증 모델을 지원한다.
- HTTP BASIC authentication headers (an IETF RFC-based standard)
- HTTP Digest authentication headers (an IETF RFC-based standard)
- HTTP X.509 client certificate exchange (an IETF RFC-based standard)
- LDAP (a very common approach to cross-platform authentication needs, especially in large environments)
- Form-based authentication (for simple user interface needs)
- OpenID authentication
- Authentication based on pre-established request headers (such as Computer Associates Siteminder)
- Jasig Central Authentication Service (otherwise known as CAS, which is a popular open source single sign-on system)
- Transparent authentication context propagation for Remote Method Invocation (RMI) and HttpInvoker (a Spring remoting protocol)
- Automatic “remember-me” authentication (so you can tick a box to avoid re-authentication for a predetermined period of time)
- Anonymous authentication (allowing every unauthenticated call to automatically assume a particular security identity)
- Run-as authentication (which is useful if one call should proceed with a different security identity)
- Java Authentication and Authorization Service (JAAS)
- Java EE container authentication (so you can still use Container Managed Authentication if desired)
- Kerberos
- Java Open Source Single Sign-On (JOSSO) *
- OpenNMS Network Management Platform *
- AppFuse *
- AndroMDA *
- Mule ESB *
- Direct Web Request (DWR) *
- Grails *
- Tapestry *
- JTrac *
- Jasypt *
- Roller *
- Elastic Path *
- Atlassian Crowd *
인증 메커니즘과 상관없이 일관적인 권한 부여 기능을 제공한다. 웹 요청 권한, 메소드 호출 권한, 개별 도메인 오브젝트 객체 접근 권한이 주요 권한 부여 영역이다.
따라하기
경고: 스프링 시큐리티에 대해 전혀 무지한 상태로 진행하기 때문에 했다가 다시 돌아가는 삽질을 자주 할 수 있음
Spring Security를 Java Configuration 방식으로 첫 번째 프로그램을 만들어 보자.
Configuration은 springSecurityFilterChain 이라 부르는 Servlet Filter를 만들어 내는데, 이것이 URL을 보호하고 id와 password를 검증하고 로그인 페이지로 리다이렉션하고 하는 일들을 한다.
새 프로젝트 만들기
Spring Initializr 로 새 프로젝트를 만들자
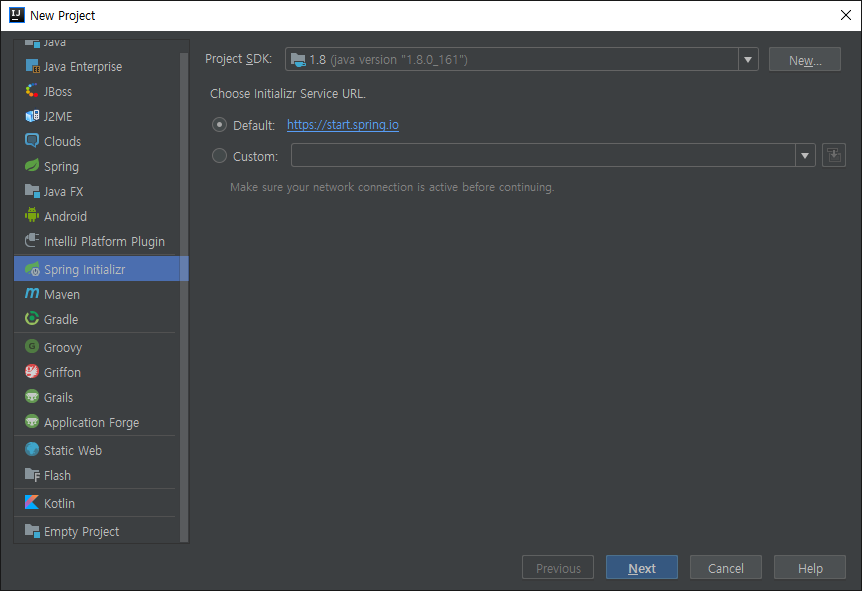 New Project 로 들어가서 Spring Initializr 를 선택하고 Next
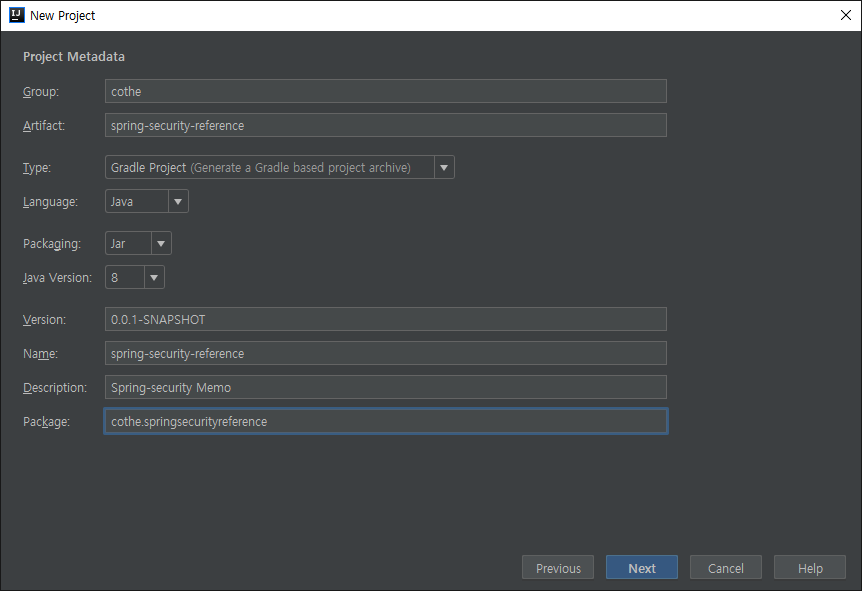 프로젝트 메타정보를 입력하고
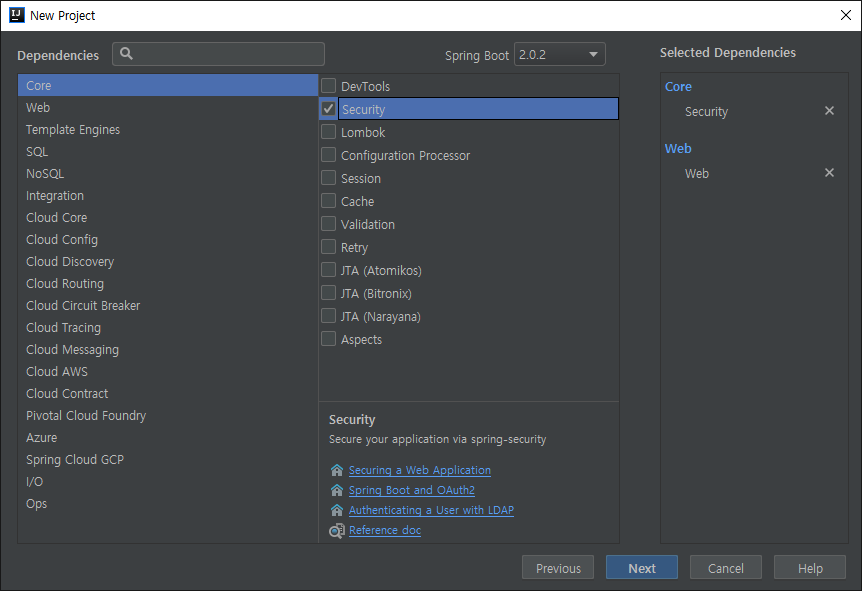 Core에 Security
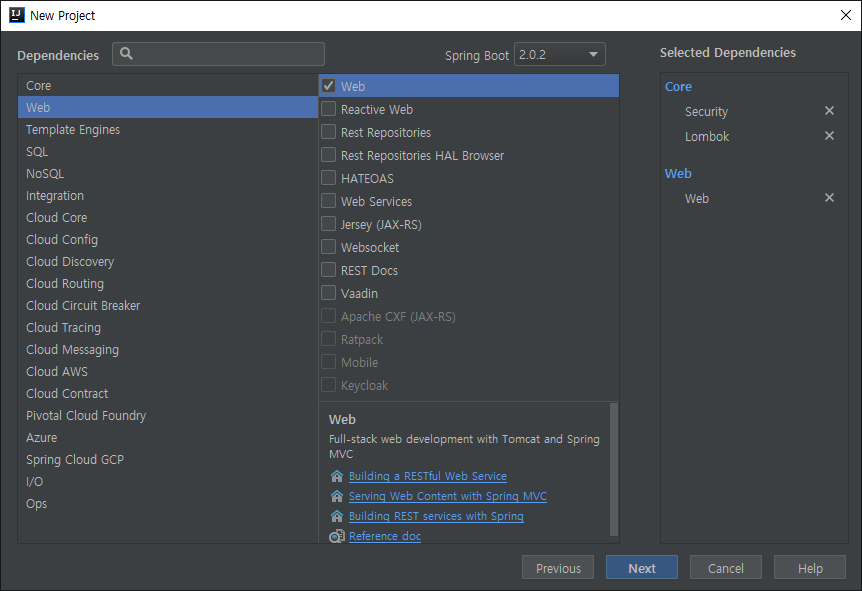 Web에 web 을 선택하자.
설정 Config class 추가
package cothe.springsecurityreference.config;

@EnableWebSecurity
public class WebSecurityConfig implements WebMvcConfigurer {
  @Bean
  public UserDetailsService userDetailsService() throws Exception {
    InMemoryUserDetailsManager manager = new InMemoryUserDetailsManager();
    manager.createUser(User.withDefaultPasswordEncoder().username("user").password("password").roles("USER").build());
    return manager;
  }
}
WebMvcConfigurer는 자동 구성된 스프링 MVC에Formatter,MessageConverter등을 추가 등록할 수 있다.WebMvcRegistrations는RequestMappingHandlerMapping,RequestMappingHandlerAdapter와ExceptionHandlerExceptionResolver를 재정의할 때 사용한다.
실행
지금까지 설정으로 스프링부트앱을 실행시키고 localhost:8080 으로 접속하면 로그인 폼이 뜬다. 이 몇 가지 안되는 설정으로 모든 URL에 대해 인증절차를 거치게 만들고 login 폼도 만들어 주고 사용자도 만들어 주고 CSRF 공격도 막아주고 등등 많은 일을 한다.

다음은 springSecurityFilterChain 을 등록시키는 것인데 우리는 spring을 쓰고 있으니 어딘가에 WebApplicationInitializer 가 분명 있다. 여기에 SpringSecurity를 ApplicationContext에 등록시켜야 한다는데 무슨 말인지 모르겠네… 일단 넘어가는 거로
결과 분석
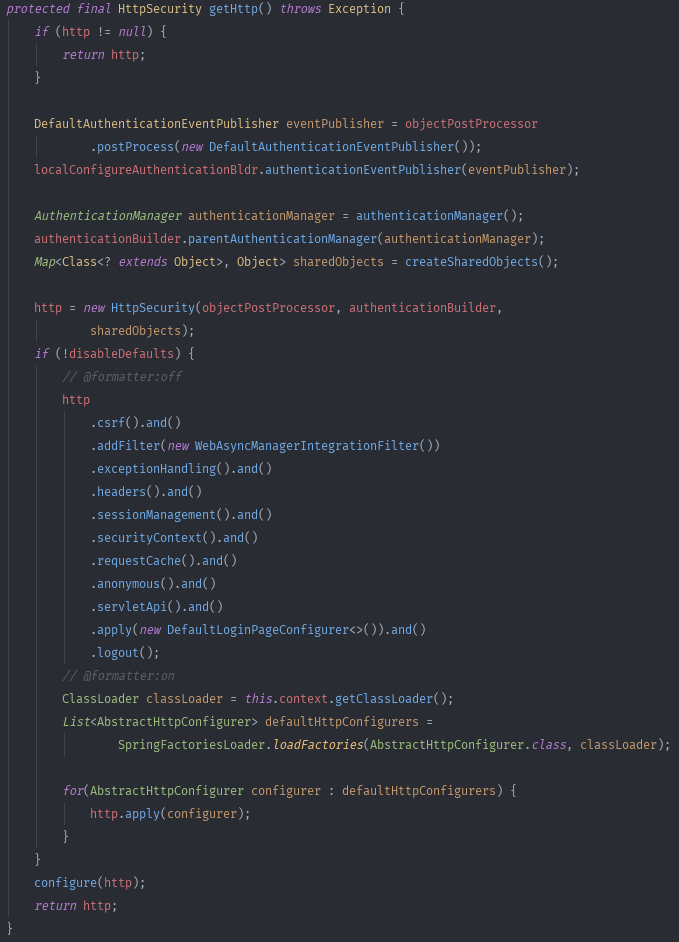
어쨌든 모든 웹 요청에 대해서 인증이 필요하게 하고, 폼기반 인증을 하게 설정된 이유는 WebSecurityConfigurerAdapter에 기본값으로 configure(HttpSecurity http) 가 그렇게 설정되어 있기 때문이라는데 찾아 들어 보자.
@EnableWebSecurity 소스를 보면 WebSecurityConfiguration 을 import 하고
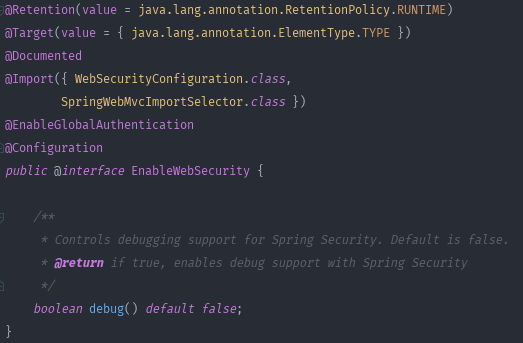
WebSecurityConfiguration에 필터체인을 리턴하는 빈 메소드에서 WebSecurityConfigurerAdapter를 만들어서 적용시키는데
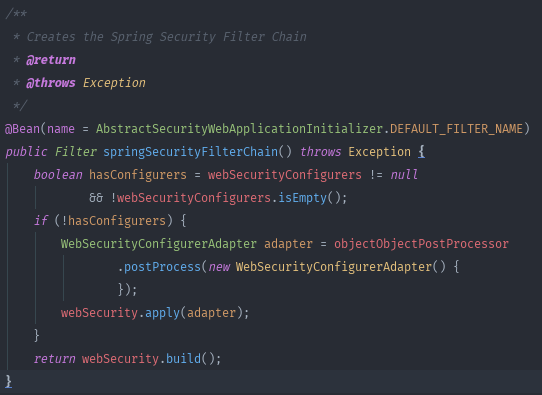
WebSecurityConfigurerAdapter 안에 이렇게 진짜로 설정되어 있네.
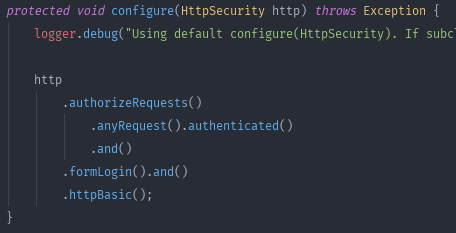
protected void configure(HttpSecurity http) throws Exception {
  http
    .authorizeRequests()
      .anyRequest().authenticated()
      .and()
    .formLogin()
      .and()
    .httpBasic();
}
사용자 정의 로그인 페이지
이제 이 설정을 오버라이딩 해서 로그인 화면을 사용자 정의 로그인 페이지로 가도록 해보자.
기존에 만들었던 WebSecurityConfig class에 WebSecurityConfigurerAdapter를 extend해서 override 하는 방법으로 일단 한 클래스로 유지해 보자.
package cothe.springsecurityreference.config;

@EnableWebSecurity
public class WebSecurityConfig extends WebSecurityConfigurerAdapter implements WebMvcConfigurer  {
  @Bean
  public UserDetailsService userDetailsService() {
    InMemoryUserDetailsManager manager = new InMemoryUserDetailsManager();
    manager.createUser(User.withDefaultPasswordEncoder().username("user").password("password").roles("USER").build());
    return manager;
  }

  @Override
  protected void configure(HttpSecurity http) throws Exception {
    http
      .authorizeRequests()
        .anyRequest().authenticated()
        .and()
      .formLogin()
        .loginPage("/login")
        .permitAll();
  }
}
.authorizeRequests().anyRequest().authenticated() 는 모든 요청에 대해서 인증을 받게 하고
.formLogin() // 폼 로그인을 쓰는데
.loginPage("/login") // 사용자가 만든 login 페이지를 쓰게하고
.permitAll(); // 이 페이지는 모든 사용자가 접근 가능하게 설정한다.
웹 요청을 처리할 수 있도록 콘트롤러 클래스를 만들고 login과 home 매핑을 추가하자.
package cothe.springsecurityreference.controller;

@Controller
public class WebController {
  @GetMapping("/login")
  public void login() {
  }

  @GetMapping("/home")
  public void home(){
  }
}
이제 view를 추가해야하는데 레퍼런스에서 jsp를 쓰고 있기때문에 똑같이 한번 넣어보자. springboot에서 jsp를 쓰려면 관련 라이브러리를 포함시키고 /WEB-INF 디렉토리를 만들어야 한다.
먼저 build.gradle 파일에 의존성을 추가하고
compile('javax.servlet:jstl')
compile('org.apache.tomcat.embed:tomcat-embed-jasper')
view를 저장할 디렉토리를 만들자. 그래서 만든 구조는
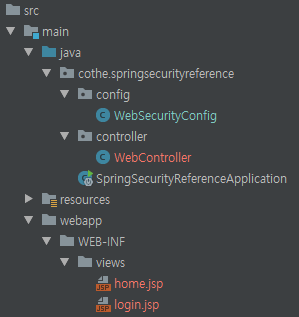
이렇게 main 디렉토리에 webapp 이하 디렉토리를 만들고 views 디렉토리 밑에 home.jsp, login.jsp를 추가시켰다.
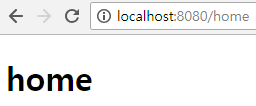
home.jsp 는 단순하게
<!DOCTYPE html>
<html lang="en">
<head>
    <meta charset="UTF-8">
    <title>Title</title>
</head>
<body>
<h1>home</h1>
</body>
</html>
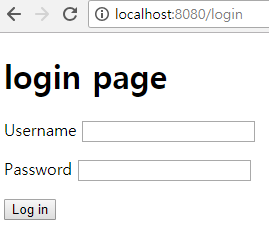
login.jsp 는 레퍼런스를 복붙했다.
<%@ page contentType="text/html; charset=UTF-8" %>
<%@ taglib prefix="c" uri="http://java.sun.com/jsp/jstl/core" %>
<!DOCTYPE html>
<html lang="en">
<head>
    <meta charset="UTF-8">
    <title>Title</title>
</head>
<body>
<h1>login page</h1>
<c:url value="/login" var="loginUrl"/>
<form action="${loginUrl}" method="post">
    <c:if test="${param.error != null}">
        <p>
            Invalid username and password.
        </p>
    </c:if>
    <c:if test="${param.logout != null}">
        <p>
            You have been logged out.
        </p>
    </c:if>
    <p>
        <label for="username">Username</label>
        <input type="text" id="username" name="username"/>
    </p>
    <p>
        <label for="password">Password</label>
        <input type="password" id="password" name="password"/>
    </p>
    <input type="hidden"
           name="${_csrf.parameterName}"
           value="${_csrf.token}"/>
    <button type="submit" class="btn">Log in</button>
</form>
</body>
</html>
레퍼런스 코드에는 jstl tag 라이브러리를 쓰고 있는데 namespace 가 추가되어 있지 않아 추가했고 캐릭터셋도 추가했다.
버튼을 누르면 form이 submit 되는데 post 방식으로 될 것이고 action은 /login 이며 CSRF 토큰을 전송 내용에 포함시켰다. jstl 문법은 여기에 간략하게 설명이 잘 되어 있다.
마지막으로 prefix, suffix 프로퍼티를 설정하자. application.properties 에
spring.mvc.view.prefix=/WEB-INF/views/
spring.mvc.view.suffix=.jsp
만약 jsp가 아니고 Thymeleaf나 Handlerbar 같이 다른 view template 엔진을 쓰게 되면 이런 속성 없이 templates 디렉터리에 넣어주면 되는데 jsp는 이제 한물가서 그런 것인지 이렇게 힘들게 해야 한다. 그럼에도 불구하고 레퍼런스는 jsp 이네…
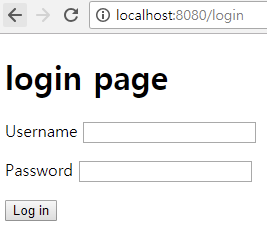
이제 app을 실행해서 localhost:8080/home 으로 접속하면 인증되지 않았기 때문에 login 페이지로 리다이렉션 되고
WebSecurityConfig 에서 추가했던 유저와 비번을 입력해서 로그인한다.
로그인을 하면 처음에 요청했던 home 화면이 뜬다.
접근 권한 설정할 때 http.authorizeRequests() 밑으로 여러 개 matcher를 붙일 수 있다. 레퍼런스와 똑같이 한번 변경해봤다.
@Override
protected void configure(HttpSecurity http) throws Exception {
  http
  .authorizeRequests()
    .antMatchers("/admin/**").hasRole("ADMIN")
    .antMatchers("/db/**").access("hasRole('ADMIN') and hasRole('DBA')")
    .anyRequest().authenticated()
    .and()
  .formLogin()
    .loginPage("/login")
    .permitAll();
}
로그아웃 구현
로그인을 했으니 이제 로그아웃을 할 차례이다. WebSecurityConfigurerAdapter를 쓰면 기본적으로 로그아웃 기능을 제공한다. /logout 으로 접근하면 로그아웃 처리를 하는데 로그아웃을 하게 되면
- HTTP Session에서 없애버리고
- RememberMe 설정이 되어 있으면 지우고
- SecurityContextHolder 도 지우고
- /login?logout 으로 리다이렉트 한다.
이렇게 얘기하는데 localhost:8080/logout 로 요청을 실제로 해보면 안된다. 뭐지??
소스를 열어봐도 logout 기능을 열어 논것 같은데 기본값으로…
StackOverflow 를 참고하여 설정정보를 직접 넣고 다시 로그아웃을 해봤다.
package cothe.springsecurityreference.config;

@Override
protected void configure(HttpSecurity http) throws Exception {
  http
    .authorizeRequests()
    .antMatchers("/admin/**").hasRole("ADMIN")
    .antMatchers("/db/**").access("hasRole('ADMIN') and hasRole('DBA')")
    .anyRequest().authenticated()
    .and()
    .formLogin()
    .loginPage("/login")
    .permitAll()
    .and()
    .logout()
    .logoutRequestMatcher(new AntPathRequestMatcher("/logout"))
    .logoutSuccessUrl("/login?logout")
    .deleteCookies("JSESSIONID")
    .invalidateHttpSession(true);
}
이렇게 logout 설정을 해주니 잘 된다. 그럼 디폴트는 동작 안하는 것인가?
레퍼런스를 잘 다시 잘 읽어보니 이런 구문이 있네
- The URL that triggers log out to occur (default is /logout). If CSRF protection is enabled (default), then the request must also be a POST. For more information, please consult the JavaDoc.
아하.. 기본값으로 CSRF 보호가 활성화되어 있는데, CSRF가 활성화되어 있으면 요청은 Post로 받아야 한다는 말이군.
그럼 Post로 로그아웃 요청을 보낼 수 있도록 home.jsp 를 수정하자.
<%@ page contentType="text/html; charset=UTF-8" %>
<%@ taglib prefix="c" uri="http://java.sun.com/jsp/jstl/core" %>
<!DOCTYPE html>
<html lang="en">
<head>
  <meta charset="UTF-8">
  <title>Title</title>
</head>
<body>
  <h1>home</h1>
  <c:url value="/logout" var="logoutUrl"/>
  <form action="${logoutUrl}" method="post">
  <input type="hidden"
         name="${_csrf.parameterName}"
         value="${_csrf.token}"/>
  <button type="submit" class="btn">Log out</button>
  </form>
</body>
</html>
로그 아웃 버튼을 만들고 csrf 가 활성상태이니 관련 파라미터도 넣어주고
package cothe.springsecurityreference.config;

@Override
protected void configure(HttpSecurity http) throws Exception {
  http
    .authorizeRequests()
    .antMatchers("/admin/**").hasRole("ADMIN")
    .antMatchers("/db/**").access("hasRole('ADMIN') and hasRole('DBA')")
    .anyRequest().authenticated()
    .and()
    .formLogin()
    .loginPage("/login")
    .permitAll()
    /*.and()
    .logout()
    .logoutRequestMatcher(new AntPathRequestMatcher("/logout"))
    .logoutSuccessUrl("/login?logout")
    .deleteCookies("JSESSIONID")
    .invalidateHttpSession(true)*/;
}
아까 추가했던 로그아웃 설정은 살짝 주석처리하고 실행
localhost:8080/home 으로 접속하면
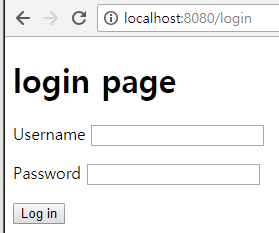
로그인 페이지가 뜨고 로그인을 하면
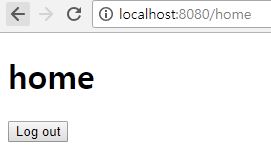
home log out 버튼이 달란 화면이 뜨고, 버튼을 누르면
짠.. 잘… 되네
레퍼런스 똑바로 안읽었으면 삽질 할 뻔했다.
뒤로 좀 땡겨서 읽어보니까(19.5.3 Logging Out) Get 방식으로 로그아웃 할 수 있게 하는 방법이 처음 설정했던 방법인데 비추천하는 방식이라고 한다.
연관된 포스트
Spring-Security Reference 따라하기 2
Spring-Security Reference 따라하기 3
Spring-Security Reference 따라하기 4
Subscribe via RSS